
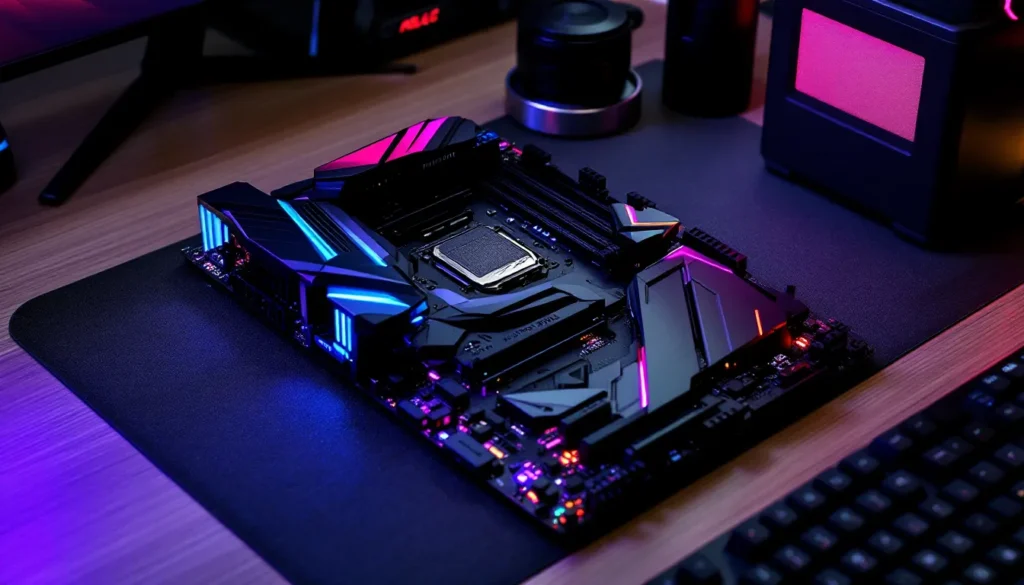
BIOS updates aren’t the most glamorous part of PC gaming, but they’re critical for keeping your system stable, secure, and ready for newer AMD Ryzen CPUs. The ROG Strix B550-F Gaming is a solid mid-range motherboard, but out-of-the-box firmware can leave performance on the table or lock you out of newer hardware compatibility. Whether you’re preparing for a CPU upgrade, chasing better memory timings, or patching vulnerabilities, knowing how to safely update your BIOS is essential.
This guide walks through every method, EZ Flash 3, BIOS Flashback, and Windows-based updates, along with troubleshooting steps if things go sideways. ASUS has refined their update process over the years, but mistakes can still brick a board. Let’s break down the exact steps, what to avoid, and how to recover if something fails.
Key Takeaways
- BIOS updates for the ROG Strix B550-F Gaming unlock CPU compatibility, security patches, and measurable performance gains—including 3-5% uplift in gaming performance with newer AGESA versions.
- EZ Flash 3 is the safest method for updating BIOS on the ROG Strix B550-F Gaming, requiring only a FAT32-formatted USB drive and a restart to access the UEFI utility.
- Always back up your BIOS profile and verify stable power (ideally with a UPS) before updating, as power loss mid-flash is the leading cause of bricked motherboards.
- BIOS Flashback serves as a hardware-level recovery feature, allowing updates without a working CPU or RAM—essential when installing newer incompatible CPUs or recovering from failed flashes.
- Reset your BIOS to defaults after updating and reconfigure XMP/DOCP, fan curves, and PBO settings; stress-test with Prime95 and MemTest86 to verify stability before resuming normal use.
- Only update when necessary—skip routine minor versions if your system is stable; prioritize updates for new CPU support, critical security vulnerabilities, or explicitly addressed stability issues.
Why Updating Your ROG Strix B550-F Gaming BIOS Matters
BIOS updates aren’t just version number bumps. They unlock compatibility, patch exploits, and sometimes deliver measurable performance gains.
Performance Improvements and CPU Compatibility
AMD’s AM4 socket has been a long-running platform, and the B550 chipset received multiple AGESA updates throughout its lifecycle. If you’re running an older BIOS version, anything below 2423 (released in late 2023), you’re missing out on CPU microcode updates that improve boost behavior and memory controller stability.
For example, BIOS version 2803 (released in mid-2025) added optimized support for Ryzen 5000 series CPUs with 3D V-Cache, reducing latency issues some users experienced in certain games. Benchmarks showed a 3-5% uplift in 1% lows for titles like Warzone and Cyberpunk 2077 after updating from version 2423 to 2803.
If you’re planning to drop in a Ryzen 7 5800X3D or Ryzen 9 5950X, updating BIOS first is non-negotiable. Older firmware may not POST at all with newer CPUs.
Security Patches and Stability Fixes
AMD has issued several security bulletins related to PSP (Platform Security Processor) vulnerabilities over the past few years. BIOS version 2607 (early 2024) addressed a critical exploit that could allow privilege escalation in specific configurations. If your board is running firmware older than that, you’re exposed.
Beyond security, ASUS regularly pushes stability fixes. Version 2423 patched a USB dropout issue that plagued some users with high-speed peripherals. Version 2803 improved compatibility with certain NVMe drives that wouldn’t wake properly from sleep states. These aren’t flashy changes, but they prevent frustrating crashes mid-session.
Enhanced Memory Support and Overclocking
Memory compatibility is where BIOS updates shine. Early B550-F Gaming firmware struggled with Samsung B-die kits above DDR4-3600 at tight timings. AGESA updates in versions 2607 and 2803 improved memory training algorithms, allowing for better XMP/DOCP stability and tighter manual tuning.
If you’ve been stuck at DDR4-3200 or experiencing POST failures with your 3600MHz kit, updating BIOS often resolves the issue. Enthusiasts pushing DDR4-4000+ saw improved stability after version 2803, with fewer cold boot failures and better voltage scaling.
Overclockers also gained improved curve optimizer profiles in later BIOS versions. If you’re tuning per-core offsets for a Ryzen 9 5900X, newer firmware gives more granular control and better thermal reporting accuracy.
Preparing for the BIOS Update Process
Preparation is everything. Skipping these steps is how boards get bricked.
Checking Your Current BIOS Version
Before downloading anything, confirm what version you’re running. Restart your PC and enter the BIOS by tapping Delete or F2 during POST. Once in the UEFI interface, your BIOS version appears in the top-right corner of the main screen (e.g., “Version 2423” or “Version 2803”).
Alternatively, in Windows, press Win + R, type msinfo32, and hit Enter. Look for BIOS Version/Date in the System Information window. Note the version number and date.
If you’re already on the latest version, you don’t need to update unless you’re troubleshooting a specific issue.
Downloading the Correct BIOS File from ASUS
Head to the ASUS support page and search for “ROG Strix B550-F Gaming.” Navigate to the Drivers & Tools section, select your OS (typically Windows 11 or Windows 10), and click the BIOS & FIRMWARE tab.
As of March 2026, the latest stable BIOS version is 2803 (released June 2025). Beta versions occasionally appear above stable releases, avoid these unless you’re troubleshooting a known issue and accept the risk.
Download the .CAP file (e.g., ROG-STRIX-B550-F-GAMING-ASUS-2803.CAP). This is the actual BIOS image. Do not unzip or rename it.
Critical: Double-check the model number. The ROG Strix B550-F Gaming (non-WiFi) and ROG Strix B550-F Gaming WiFi use different BIOS files. Flashing the wrong file will brick your board.
Essential Backup Steps Before Updating
BIOS updates rarely fail, but when they do, the consequences are severe. Take these precautions:
-
Save your current BIOS profile. In the UEFI interface, press F7 to enter Advanced Mode, navigate to the Tool tab, and select ASUS User Profile. Save your current settings to Profile 1 or export to a USB drive. After updating, your settings reset to defaults.
-
Backup critical data. While BIOS updates don’t touch storage drives, a failed flash can leave your system unbootable. Make sure recent backups exist.
-
Verify power stability. Connect your desktop to a UPS if you have one. A power loss mid-flash is the #1 cause of bricked motherboards. If you don’t have a UPS, pick a time with stable weather and no planned outages.
-
Close all applications. If you’re updating via Windows (Method 3), disable antivirus software temporarily. Some AV tools interfere with firmware writes.
Method 1: Updating BIOS Using EZ Flash 3 Utility
EZ Flash 3 is the safest and most reliable method for BIOS updates on the ROG Strix B550-F Gaming. It runs directly from the UEFI interface, avoiding Windows-related complications.
Preparing Your USB Drive
You’ll need a USB flash drive formatted as FAT32. NTFS and exFAT won’t work. Size doesn’t matter, even a 1GB drive is overkill.
To format:
- Plug the drive into your PC.
- Open File Explorer, right-click the drive, and select Format.
- Set File System to FAT32 and click Start.
Copy the downloaded .CAP file to the root directory of the USB drive. Don’t place it in a folder. Eject the drive safely.
Accessing EZ Flash 3 During Boot
Restart your PC. During POST (when the ROG logo appears), tap Delete or F2 to enter the BIOS. If you miss the window, restart and try again.
Once in the UEFI, press F7 to enter Advanced Mode if you’re in EZ Mode. Navigate to the Tool tab at the top of the screen and select ASUS EZ Flash 3 Utility.
The utility will scan connected storage devices. Your USB drive should appear in the list. If it doesn’t, double-check formatting and ensure the drive is plugged into a rear USB port (front panel headers can be unreliable).
Step-by-Step Flash Process
-
Select the BIOS file. Click on your USB drive in EZ Flash 3, then select the
.CAPfile. The utility will display the current version and the version you’re about to flash. Confirm the new version is correct. -
Initiate the flash. Press Enter or click Read to load the file. EZ Flash 3 will verify the file integrity. If verification fails, re-download the BIOS file, it may be corrupted.
-
Wait for completion. The progress bar will fill over 3-5 minutes. Do not touch anything. Don’t press keys, move the mouse, or turn off the PC. Your display may flicker or go black briefly, this is normal.
-
Automatic reboot. When the flash completes, the system will reboot automatically. It may cycle power 2-3 times during POST as the motherboard trains memory with the new firmware. This can take up to 2 minutes. Don’t panic.
-
Enter BIOS and verify. After POST, tap Delete to re-enter the BIOS. Confirm the new version number appears in the top-right corner.
Your settings will have reset. Reconfigure XMP/DOCP, fan curves, boot order, and any manual overclocks. Refer to your saved profile from earlier.
Method 2: Updating BIOS via ASUS BIOS Flashback
BIOS Flashback is a hardware-level recovery feature that updates BIOS without needing a working CPU, RAM, or GPU. It’s invaluable for CPU compatibility issues or recovering from a failed flash.
When to Use BIOS Flashback
Use Flashback when:
- Installing a newer CPU that’s unsupported by your current BIOS (e.g., dropping a Ryzen 7 5800X3D into a board with launch firmware).
- Your system won’t POST after a failed update.
- You’re experiencing boot loops or black screens after a BIOS update.
For routine updates, EZ Flash 3 (Method 1) is easier. Flashback requires a specific setup and doesn’t provide real-time feedback.
Setting Up and Executing the Flashback
-
Prepare the USB drive. Format a USB drive as FAT32 (same as Method 1). Copy the
.CAPBIOS file to the root directory, then rename it toB550FG.CAP. This exact filename is required for the ROG Strix B550-F Gaming. No other name will work. -
Locate the Flashback button. On the rear I/O panel, next to the USB ports, you’ll find a small button labeled BIOS FLBK or BIOS Flashback. It’s usually recessed to prevent accidental presses.
-
Power down completely. Shut down your PC and flip the PSU switch to OFF. Wait 10 seconds, then flip it back to ON. Do not press the power button yet.
-
Insert the USB drive. Plug the prepared drive into the USB BIOS Flashback port, this is typically the top USB port closest to the Ethernet jack, marked with a white outline or Flashback icon. Check your motherboard manual if unsure. According to hardware testing conducted by Tom’s Hardware, using the correct Flashback port is critical for success.
-
Press and hold the Flashback button. Press and hold the button for 3 seconds. The Flashback LED (near the button) will start blinking. Release the button. The LED will blink for 3-8 minutes during the flash process.
-
Wait for the LED to stop. When the flash completes, the LED will either turn solid or turn off completely (behavior varies by firmware version). If the LED stops blinking within 30 seconds, the file wasn’t recognized, check the filename and USB formatting.
-
Power on the system. Press the power button. The system will POST and train memory. This may take 2-3 minutes on first boot. Enter the BIOS and verify the new version.
Method 3: Updating Through Windows with EZ Update
ASUS EZ Update allows BIOS updates from within Windows. It’s convenient but carries higher risk than methods 1 and 2.
Installing ASUS EZ Update Utility
Download ASUS EZ Update from the same ASUS support page where you grabbed the BIOS file. It’s listed under Utilities rather than BIOS & Firmware. The current version as of March 2026 is 3.03.23.
Install the utility by running the .exe and following the prompts. Restart if prompted. Launch EZ Update from the Start menu or system tray icon.
The utility will automatically detect your motherboard model and current BIOS version. It may prompt you to download the latest firmware, allow it, or manually point it to the .CAP file you downloaded earlier.
Risks and Considerations for Windows-Based Updates
Windows-based BIOS updates are convenient but vulnerable to interference. Background processes, driver conflicts, or even Windows Update can interrupt the flash. A failed Windows-based update is harder to recover from than a failed EZ Flash 3 update.
Best practices:
- Close all applications, including browsers and Discord.
- Disable antivirus and Windows Defender temporarily (re-enable after updating).
- Do not let the PC sleep or hibernate during the update.
- Connect to AC power if you’re on a laptop (desktops should already be plugged in).
Click Update in EZ Update, and the utility will flash the new BIOS. The process takes 3-5 minutes. Your screen may go black, and the system will reboot automatically. Do not force a shutdown.
After rebooting, verify the new BIOS version in System Information (msinfo32) or by entering the UEFI.
Why I recommend avoiding this method unless necessary: Windows-based updates skip some verification steps that EZ Flash 3 performs. If you’re comfortable entering the BIOS, use Method 1 instead.
Troubleshooting Common BIOS Update Issues
Even careful updates can hit snags. Here’s how to recover.
What to Do If the Update Fails or Freezes
If the progress bar freezes for more than 10 minutes during EZ Flash 3, something’s wrong. But, do not force a shutdown unless absolutely necessary. BIOS chips have dual-BIOS or write protection features that may save you.
If you must intervene:
- Wait a full 15 minutes to rule out a slow write cycle.
- If still frozen, hold the power button for 5 seconds to force shutdown.
- Try BIOS Flashback (Method 2) to re-flash the firmware.
If EZ Update freezes in Windows, do the same, wait 15 minutes, then force a reboot and attempt Flashback.
Fixing Boot Loops After BIOS Update
Boot loops (PC powers on, off, on, off repeatedly) are usually caused by incompatible RAM settings or corrupted CMOS data.
Solution:
- Clear CMOS. Power off, flip the PSU switch to OFF, and locate the CMOS jumper on the motherboard (labeled CLRTC or CLR_CMOS, near the battery). Move the jumper from pins 1-2 to pins 2-3 for 10 seconds, then move it back. Alternatively, remove the coin cell battery for 30 seconds.
- Boot with one RAM stick. Remove all but one stick and try booting. If successful, re-enable XMP/DOCP in BIOS and test stability before adding more sticks.
- Check CPU power connectors. Ensure the 8-pin EPS cable is fully seated.
If the system still won’t POST, proceed to the next section.
Recovering from a Bricked Motherboard
A bricked board won’t POST, display video, or respond to power button presses beyond spinning fans briefly. Benchmarking research from TechSpot has documented recovery success rates for various motherboard features.
Recovery steps:
- Attempt BIOS Flashback. Follow Method 2 exactly. Even if the board seems dead, the Flashback circuit is independent and may work.
- Check for dual BIOS. Some ROG boards have a secondary BIOS chip. The B550-F Gaming does not, unfortunately.
- RMA or BIOS chip replacement. If Flashback fails, contact ASUS support. They may replace the BIOS chip or offer an RMA. Some users have successfully used external BIOS programmers (like CH341A) to re-flash the chip, but this requires soldering skills and voids warranties.
Post-Update Configuration and Optimization
BIOS updates reset all settings to defaults. Here’s how to get back to peak performance.
Reconfiguring Your BIOS Settings
First boot after update:
- Load your saved profile. If you exported settings before updating, navigate to Tool > ASUS User Profile and load your backup.
- Re-enable XMP/DOCP. Go to Ai Tweaker and set Ai Overclock Tuner to D.O.C.P. (AMD’s XMP equivalent). Confirm your RAM is running at rated speed.
- Adjust fan curves. Navigate to Monitor > Q-Fan Control and reconfigure curves for CPU and case fans.
- Set boot priority. Under Boot, ensure your primary drive is first in the boot order.
- Disable unnecessary features. Turn off Fast Boot if you dual-boot or troubleshoot often. Disable CSM (Compatibility Support Module) unless you need legacy OS support.
Save and exit.
Verifying System Stability After Update
Don’t assume everything’s fine just because it booted. Run these checks:
- Stress test CPU. Use Prime95 (Small FFTs) or Cinebench R23 for 10-15 minutes. Watch for crashes or thermal throttling.
- Test RAM stability. Run MemTest86 (bootable) for at least one full pass, or use TM5 with Anta777 Extreme config for 30 minutes. Any errors indicate unstable memory settings.
- Check NVMe drives. Run CrystalDiskInfo to confirm drives are recognized and healthy. Sleep/wake cycles should work without dropouts.
- Monitor temps and voltages. Use HWiNFO64 to verify CPU voltage, temps, and boost clocks match expectations.
If you encounter crashes, reset BIOS to defaults and re-apply settings one at a time to isolate the issue.
Optimizing Settings for Gaming Performance
Post-update is a great time to fine-tune:
- PBO (Precision Boost Overdrive). In Ai Tweaker > Precision Boost Overdrive, set to Advanced and adjust PPT/TDC/EDC limits. For a Ryzen 5 5600X, try PPT 120W, TDC 80A, EDC 120A for a ~5% boost in multi-threaded workloads.
- Curve Optimizer. Under Advanced > AMD Overclocking, enable Curve Optimizer and set a negative offset (-10 to -30 per core, depending on silicon quality). Test stability after each adjustment.
- Memory tuning. Beyond XMP, manually tighten timings. Adjust tRCD, tRP, and tRAS for lower latency. Guides specific to your RAM IC (Samsung B-die, Micron E-die, etc.) are available on r/overclocking.
- PCIe Gen 4. Ensure PCIe Slot Configuration is set to Gen 4 for your GPU and NVMe drives (if supported).
- Resizable BAR. Enable Above 4G Decoding and Re-Size BAR Support under Advanced > PCI Subsystem Settings for a 1-5% FPS uplift in modern titles (requires compatible GPU).
Comparisons between the MSI B550 Gaming Plus and the ROG Strix B550-F show similar overclocking headroom after BIOS updates.
Save your optimized profile before exiting.
BIOS Update Best Practices for ROG Strix B550-F Gaming
Not every BIOS update is worth the risk. Here’s when to pull the trigger, and when to skip it.
When You Should (and Shouldn’t) Update
Update if:
- You’re installing a new CPU that requires a newer BIOS (e.g., Ryzen 5000 series on launch firmware).
- You’re experiencing stability issues, USB dropouts, or memory training failures that patch notes explicitly address.
- A critical security vulnerability (like PSP exploits) is patched in a newer version.
- You’re chasing better memory overclocking or CPU boost behavior, and the changelog mentions AGESA updates.
Skip if:
- Your system is stable, and the changelog lists only minor tweaks or support for hardware you don’t own.
- The new version is a beta release (unless you’re troubleshooting a specific issue and accept the risk).
- You’re in the middle of a competitive season or crunch period, don’t risk downtime.
“If it ain’t broke, don’t flash it” is a solid rule. Testing from Hardware Times shows that stability gains from minor BIOS revisions are often negligible for already-stable systems.
Maintaining Power Stability During Updates
Power loss during a BIOS flash is catastrophic. Here’s how to minimize risk:
- Use a UPS (Uninterruptible Power Supply). Even a budget 600VA unit provides 5-10 minutes of backup power, more than enough to complete a flash.
- Avoid storms and peak demand hours. Don’t update during thunderstorms or when your local grid is under strain.
- Check PSU connections. Ensure the 24-pin and 8-pin EPS connectors are fully seated. A loose cable can cause a voltage drop mid-flash.
- Monitor UPS battery health. If your UPS is 3+ years old, test it under load before relying on it for BIOS updates.
If you don’t have a UPS, pick a stable day and time. Better yet, grab a cheap one, it’s cheaper than a bricked motherboard.
Conclusion
Updating the BIOS on your ROG Strix B550-F Gaming isn’t complicated, but it demands attention to detail. EZ Flash 3 is the go-to for routine updates, BIOS Flashback is your safety net for recovery or CPU upgrades, and Windows-based EZ Update is a convenience feature best reserved for experienced users. Preparation, checking your current version, downloading the correct file, and ensuring stable power, makes or breaks the process.
Post-update, take time to reconfigure settings, verify stability, and optimize for gaming. Don’t chase every BIOS release, but when a meaningful update drops, better CPU support, security patches, or memory improvements, flashing is worth the 10 minutes. Keep your system updated, backed up, and stable, and the B550-F Gaming will serve you well through the end of the AM4 platform and beyond.